 Save to Pinterest
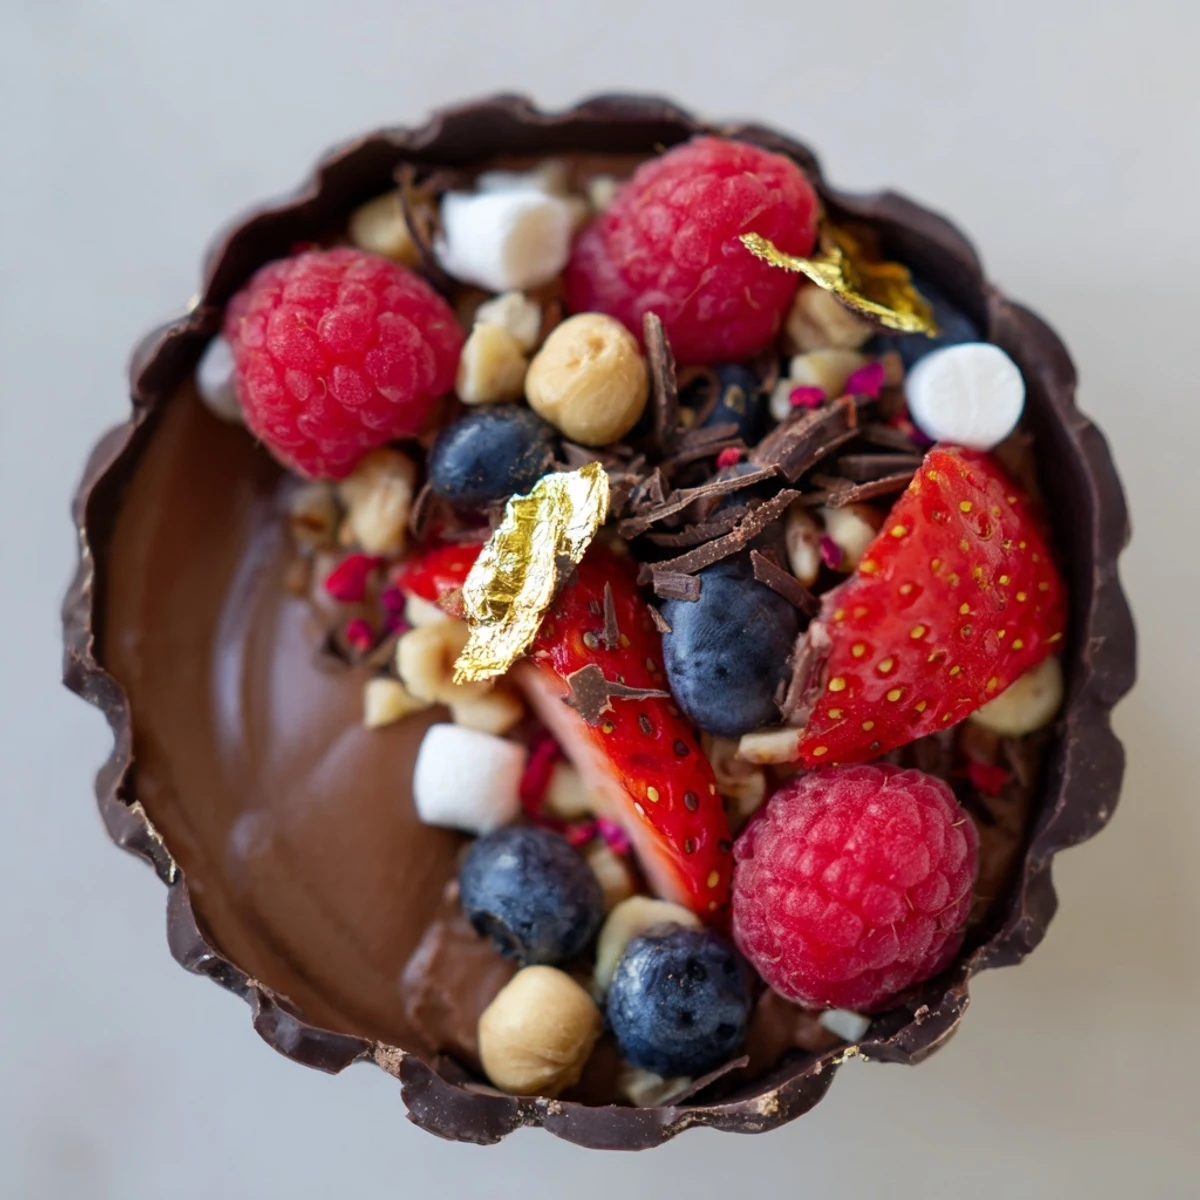
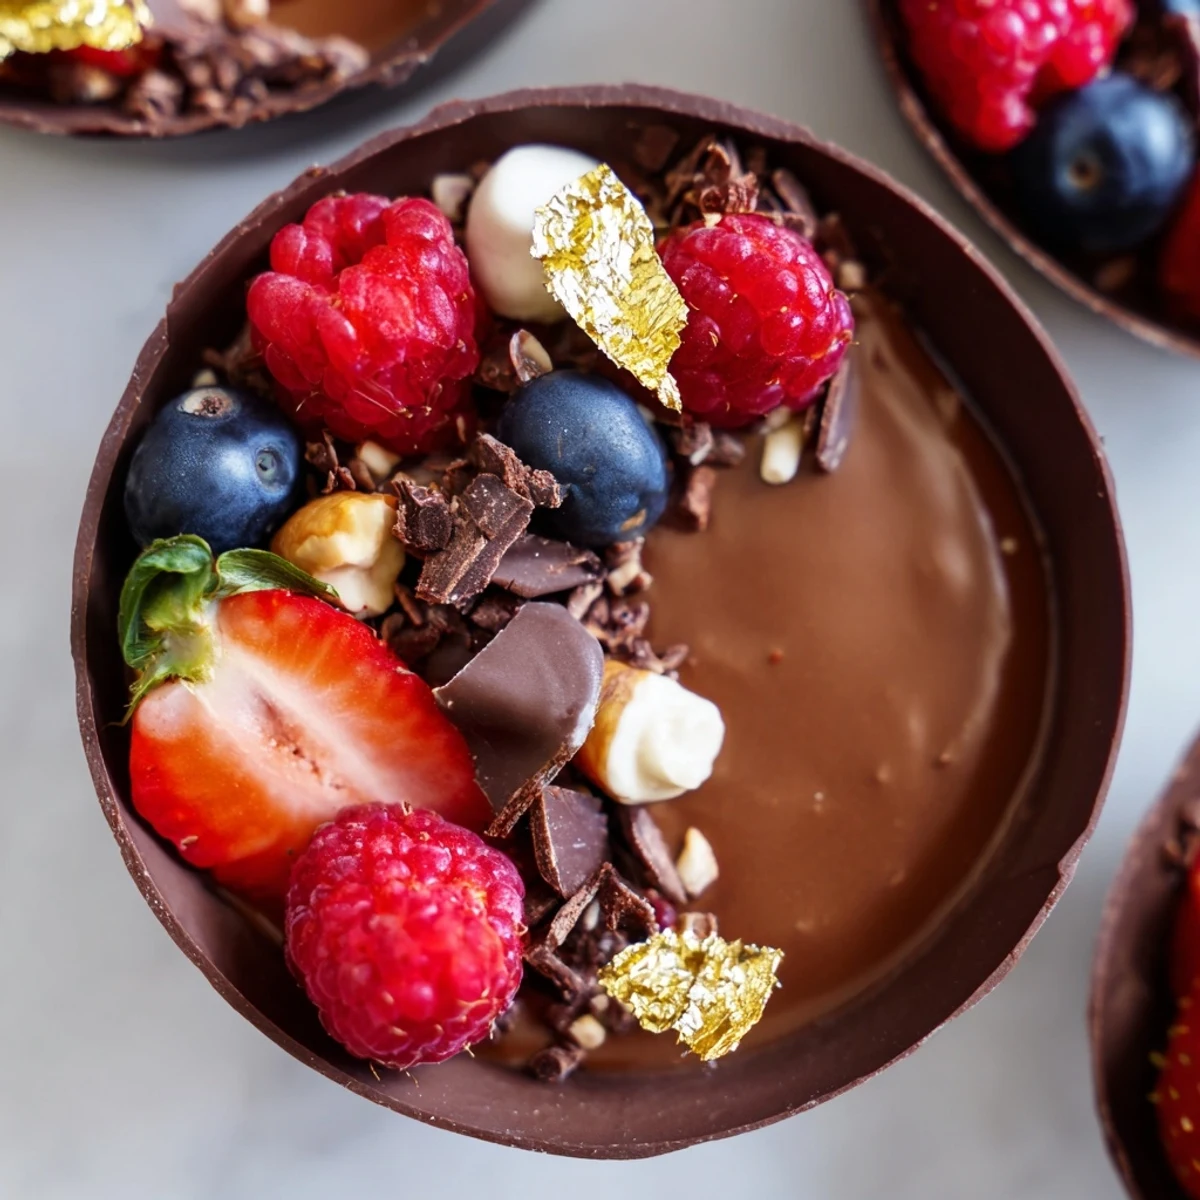
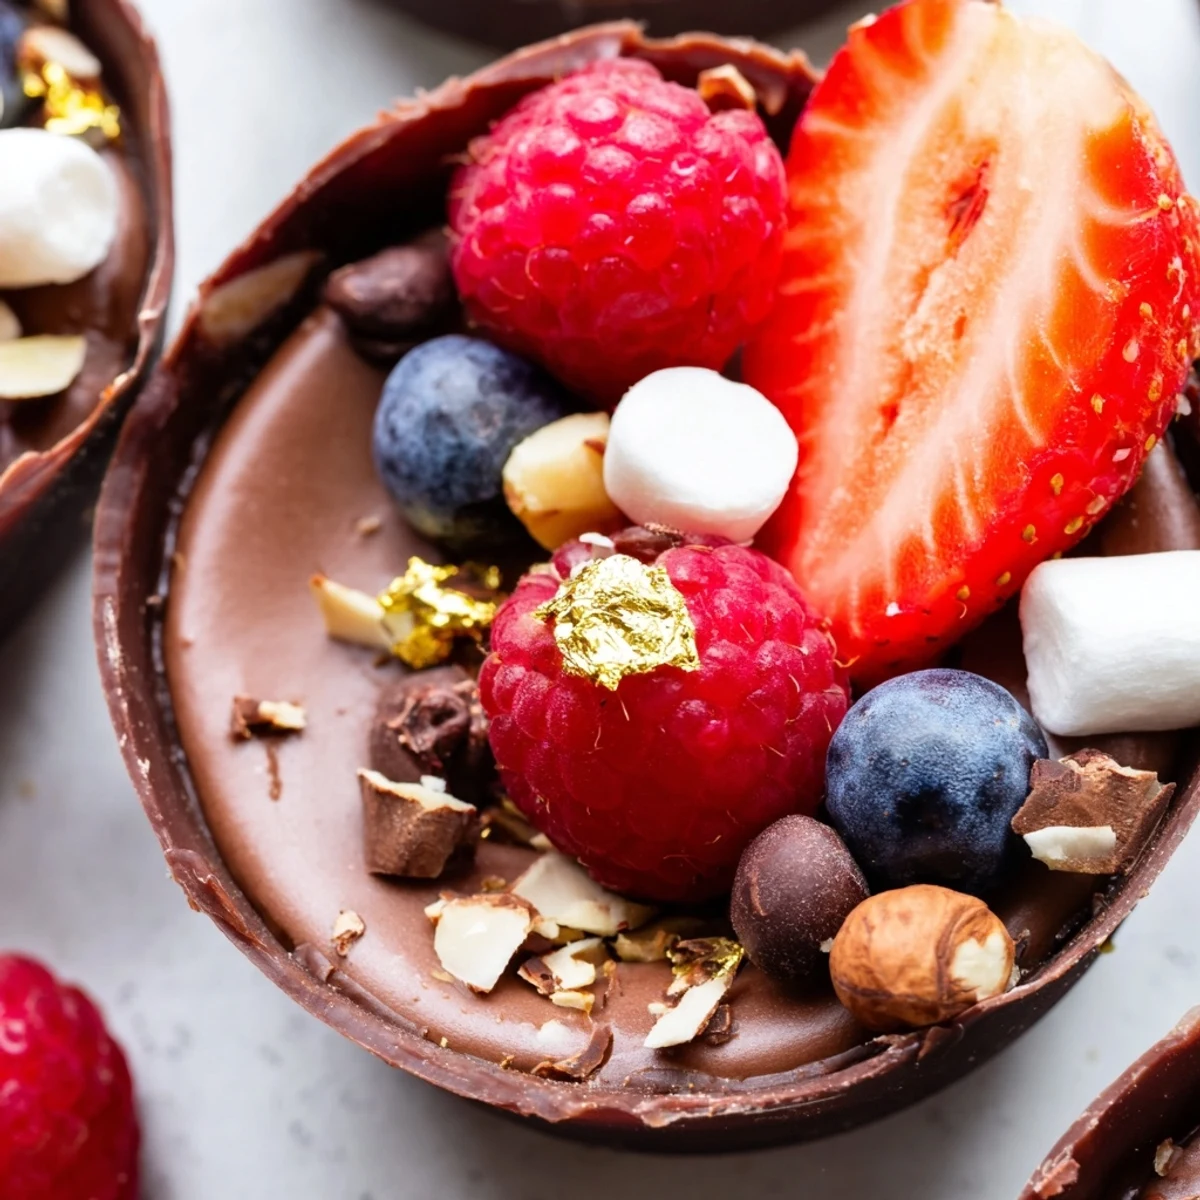
 These sophisticated chocolate grazing cups combine handmade dark chocolate shells with velvety chocolate mousse, creating an impressive dessert that tastes as beautiful as it looks. Fresh mixed berries provide tart contrast, while chopped nuts, marshmallows, and chocolate curls add delightful texture variety. The edible gold leaf adds that special occasion touch perfect for celebrations.
Despite their restaurant-quality presentation, these cups are surprisingly simple to prepare. The chocolate shells require just melting and brushing into liners, while the mousse comes together with basic folding technique. Best of all, you can customize toppings based on preference or seasonal availability.
Serve these at dinner parties, bridal showers, holiday gatherings, or whenever you want to elevate dessert time. The individual portions make self-service effortless, and guests will love the interactive grazing experience.
The first time I made chocolate cups, I accidentally discovered the most satisfying kitchen hack ever. I'd melted chocolate for something else entirely, then got distracted by a phone call. When I returned, the chocolate had pooled into these gorgeous lacy patterns against the parchment. Now I make these grazing cups intentionally, and they never fail to make people gasp when they arrive at dessert time.
Last summer I served these at my sister's engagement party, and honestly, they stole the show. My usually reserved brother-in-law ate three in rapid succession, then proceeded to ask if I could make them for his birthday instead of cake. The edible gold leaf made everything feel ridiculously fancy, but the real magic was watching guests customize their own cups with the topping bar I set up.
Ingredients
- Dark chocolate (at least 60% cocoa): The higher cocoa percentage gives your cups structural integrity and that sophisticated slightly bitter note that balances the sweet mousse beautifully
- Heavy cream: Cold cream whips up better and faster, so pop your bowl and whisk in the freezer for 10 minutes before starting
- Fresh mixed berries: The tartness of raspberries and brightness of strawberries cuts through all that rich chocolate intensity
- Chopped nuts: Toast them lightly beforehand for that nutty aroma that hits you before you even take a bite
Instructions
- Create your chocolate vessels:
- Melt the chocolate in 30-second bursts, stirring between each, until it's glossy and smooth. Use the back of a spoon to coat your cupcake liners, working quickly before the chocolate starts to set. The thickness should be like a coat of paint, not a wall, or they'll be impossible to bite through later.
- Let the chilling magic happen:
- Pop your tray in the fridge for exactly 20 minutes, then check if the chocolate has released from the liners. Gently peel starting from the top edge, and if any chocolate sticks, give it another 5 minutes.
- Whip up clouds of mousse:
- Melt the second chocolate portion and let it cool to barely warm while you whip your cream to soft peaks. Fold a dollop of cream into the chocolate first, then gently incorporate that mixture back into the remaining cream. Think fold, don't stir, or you'll lose all that air you just whipped in.
- Assemble your edible art:
- Pipe or spoon the mousse into each chocolate cup, leaving room at the top for the toppings. I like to pile berries on one side and create little clusters of nuts and marshmallows on the other, then tuck chocolate curls into any gaps.
- Final chill:
- Give everything at least 20 minutes in the fridge so the mousse firms up slightly and all the flavors get friendly with each other.
 Save to Pinterest
 These have become my go-to for bring-to-dinner-party desserts because they travel surprisingly well if chilled thoroughly first. I once transported them across town in a cooler bag, and not a single cup cracked or mousse melted. Now they're my secret weapon for any gathering where I want to look like I put in way more effort than I actually did.
Making Chocolate Cups That Actually Release From Liners
The biggest frustration with chocolate cups is when they stick and shatter while you're trying to unmold them. I've learned that silicone liners work better than paper, and giving the chocolate a full 20 minutes of chill time is non-negotiable. If you're impatient like me, set a timer and walk away, do something else, anything else, but don't peek.
Getting That Perfect Mousse Texture
Over-whipped cream makes grainy mousse, and under-whipped cream makes a sad, flat filling. Watch for soft peaks that gently flop over when you lift the whisk, not stiff peaks that stand at attention. Also, room temperature chocolate will deflate your whipped cream instantly, so let that melted chocolate cool until it's barely warm to the touch before folding.
Customizing Your Topping Bar
Set up bowls of different toppings and let guests build their own perfect final touch. I've found that people get surprisingly creative and competitive about making the most beautiful cup. Last time, my friend arranged her berries in a perfect geometric pattern while someone else went maximalist with every single topping available.
- Crushed cookies or graham crackers add an unexpected crunch element
- Sea salt flakes on top of the mousse before garnishing creates that salted chocolate effect
- Mint leaves tucked among the berries make everything taste fresher and more sophisticated
 Save to Pinterest
 There's something deeply satisfying about edible vessels, maybe it's the novelty or maybe it's just that everything tastes better when you can eat the container too. Watch people's faces when they realize the whole thing is fair game, that's the real dessert.
Recipe FAQs
- → Can I make chocolate cups in advance?
-
Yes, prepare the chocolate shells up to 2 days ahead and store in an airtight container at room temperature. The mousse can be made 24 hours in advance and refrigerated. Assemble the cups 4-6 hours before serving for optimal texture.
- → What chocolate percentage works best?
-
Dark chocolate with 60-70% cocoa content creates the ideal balance—sweet enough for enjoyment but rich enough to hold its shape at room temperature. Higher percentages may become brittle, while lower percentages might not set properly.
- → Can I use store-bought chocolate cups?
-
Absolutely. Store-bought chocolate cups work wonderfully and save significant prep time. Look for them at specialty baking stores or online. Just ensure they're food-grade and properly sealed to maintain freshness.
- → What other toppings can I use?
-
Consider crushed cookies, pretzels for saltiness, shredded coconut, citrus zest, candy pieces, fresh mint leaves, or even a drizzle of caramel or fruit sauce. Seasonal fruits like pomegranate seeds or kiwi also work beautifully.
- → How do I transport these without damage?
-
Use a rigid container with cupcake inserts to prevent tipping. Keep them chilled during transport—coolers with ice packs work well. For longer distances, consider packing shells and mousse separately, then assembling on site.
- → Can I make these vegan?
-
Yes. Use dairy-free dark chocolate and coconut cream instead of heavy cream. The whipped coconut cream creates an equally lush mousse texture. Ensure all toppings are plant-based, and skip marshmallows unless using vegan varieties.