 Save to Pinterest
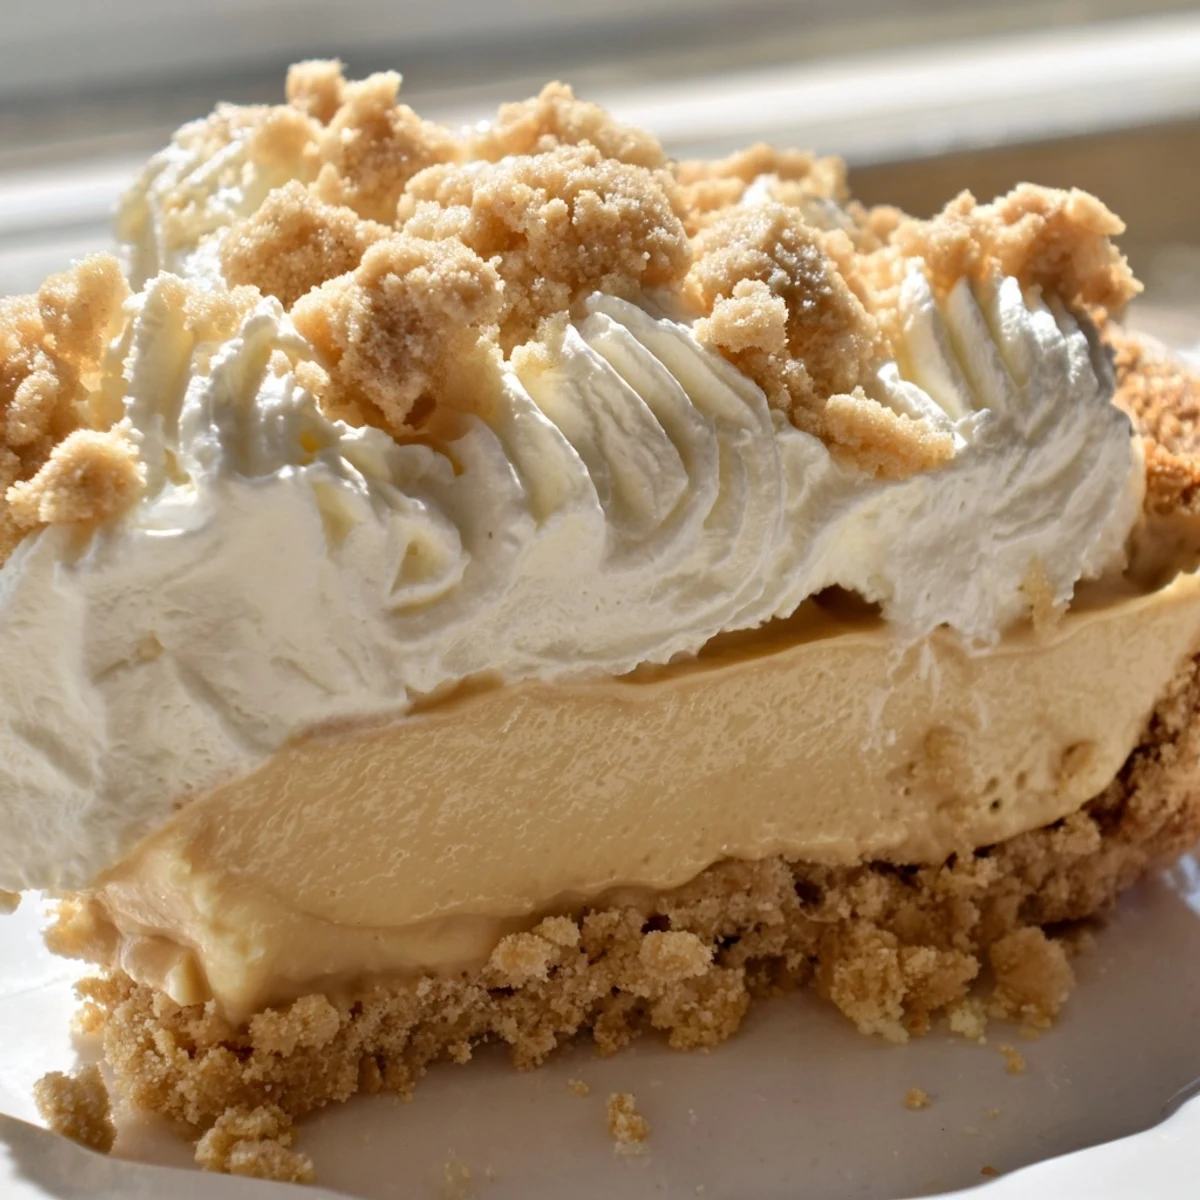
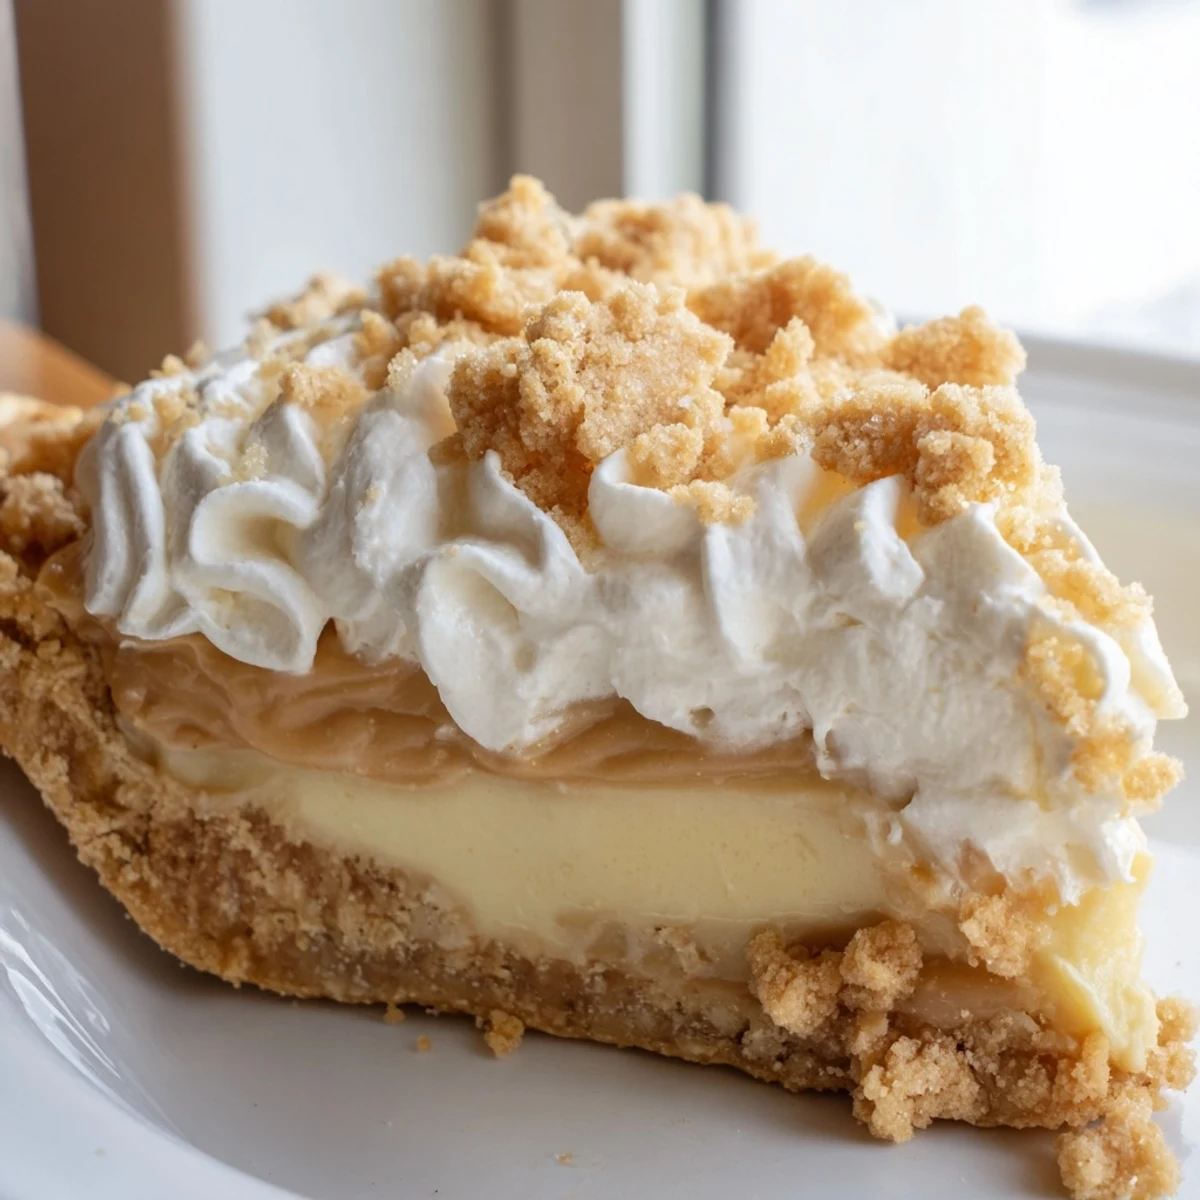
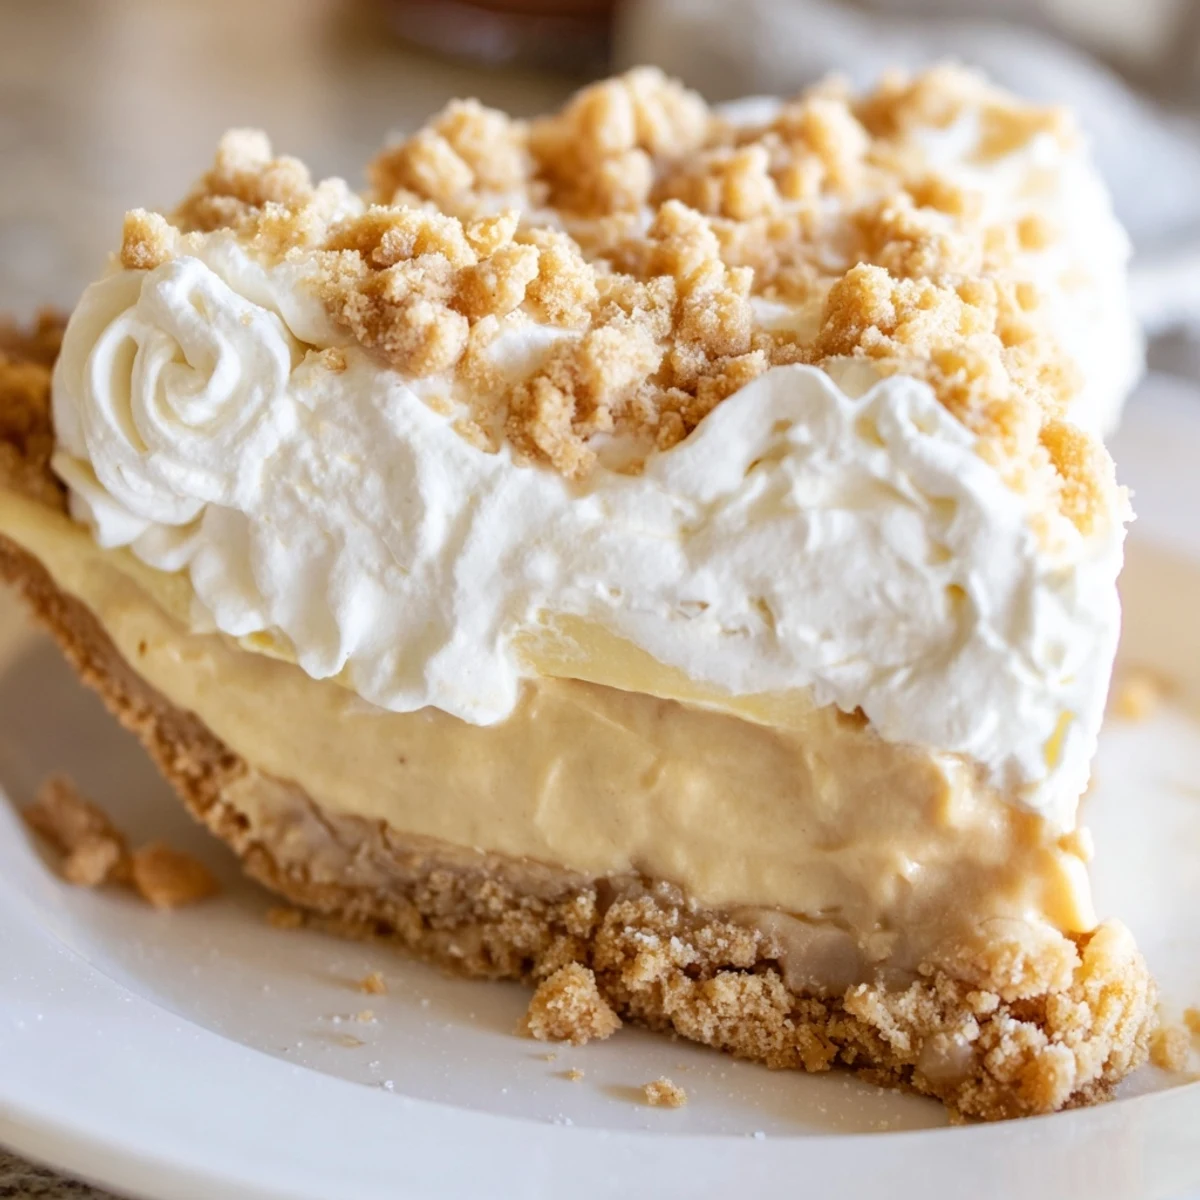
 This dreamy Amish-style dessert combines a velvety custard-like peanut butter filling with layers of crunchy peanut butter crumbs and fluffy whipped cream. The result is a perfectly balanced sweet and creamy treat that delivers old-fashioned comfort in every bite.
What makes this pie special is the texture contrast—the smooth, glossy filling pairs beautifully with the crumbly peanut butter layer throughout and the light whipped topping. It's an easy-to-make dessert that tastes like it came from a farmhouse kitchen.
Perfect for holidays, potlucks, or family gatherings, this pie needs just 25 minutes of active prep time before chilling to set. The combination of creamy filling, crisp crust, and peanutty crunch creates an irresistible dessert that will have everyone asking for seconds.
The counter was covered in powdered sugar dust when my grandmother first taught me how to make the peanut butter crumble layer. She had this way of measuring with her hands, dumping ingredients into the bowl while telling stories about church potlucks where this pie would disappear within minutes. Now whenever I mix that crumble, I can practically hear the hum of conversation and silverware clinking against church basement plates.
I brought this to a summer barbecue last year, and my friend Sarah actually chased me down before I left to demand the recipe. Her kids, who usually refuse anything homemade, went back for seconds. Theres something about peanut butter and cream that just makes people feel cared for, like a hug in dessert form.
Ingredients
- 1 9-inch prepared pie crust: Use a good quality store-bought crust, or bake your favorite homemade recipe and let it cool completely
- 3/4 cup creamy peanut butter: The smooth kind works best for that perfect crumble texture without any grittiness
- 1 cup powdered sugar: This sweetens the crumble while keeping it dry enough to sprinkle beautifully
- 2/3 cup granulated sugar: The foundation for our silky pudding filling
- 1/3 cup all-purpose flour: Essential for thickening the custard to just the right consistency
- 1/4 teaspoon salt: Balances all that sweetness and makes the peanut butter flavor sing
- 2 cups whole milk: Full fat is crucial here for the richest, creamiest pudding layer
- 3 large egg yolks: These create that glossy, restaurant-quality pudding texture
- 1 teaspoon pure vanilla extract: Dont skimp here, it rounds out all the flavors beautifully
- 2 tablespoons unsalted butter: Adds a final touch of richness to the filling
- 1 cup heavy whipping cream: The foundation for that cloud-like whipped topping
- 2 tablespoons powdered sugar: Just enough to sweeten the cream without overpowering
- 1/2 teaspoon vanilla extract: A little vanilla in the whipped cream makes everything taste homemade
Instructions
- Make the peanut butter crumble:
- Grab a medium bowl and dump in the peanut butter with the powdered sugar. Use a fork to work them together until the mixture looks like damp sand and holds together when you squeeze it.
- Layer the bottom crust:
- Take half of your crumble mixture and press it gently into the bottom of your cooled pie shell. This creates those surprise pockets of peanut butter goodness throughout the filling.
- Start the pudding base:
- In a medium saucepan, whisk together the granulated sugar, flour, and salt until combined. Slowly pour in the milk while whisking constantly to prevent any lumps from forming.
- Cook the custard:
- Set the pan over medium heat and stir without stopping. The mixture will thicken and suddenly bubble, about 4 to 5 minutes. Watch closely.
- Temper the egg yolks:
- In a separate bowl, whisk those egg yolks until theyre a sunny yellow. Ladle in about half a cup of the hot milk mixture, whisking furiously the whole time.
- Combine everything:
- Pour the warmed egg mixture back into the saucepan while whisking. Cook for 2 more minutes until the pudding is thick enough to coat the back of a spoon.
- Finish the filling:
- Remove from heat and stir in the butter and vanilla until the pudding is smooth and glossy. Let it cool for about 15 minutes.
- Assemble the pie:
- Pour the warm filling over the crumble layer in your pie shell. Refrigerate for at least 2 hours until the pudding is completely set.
- Whip the cream:
- Beat the heavy cream, powdered sugar, and vanilla until stiff peaks form. Spread it generously over the chilled pie.
- Add the finishing touch:
- Sprinkle the remaining peanut butter crumble over the whipped cream just before serving. The contrast between fluffy cream and crumbly topping is pure magic.
 Save to Pinterest
 My daughter requested this for her birthday instead of cake last year, which felt like such an honor. Watching her face light up when she took that first bite, with the whipped cream mustache and everything, reminded me why simple desserts are sometimes the most memorable.
Make It Your Own
Sometimes I swap half the peanut butter for chocolate hazelnut spread, and honestly, the results are spectacular. The chocolate pairs so beautifully with the peanut butter, creating this mocha undertone that feels fancier than it should. A graham cracker crust instead of regular pastry also works beautifully and adds even more texture.
Serving Suggestions
This pie shines after a casual supper, especially alongside something savory like barbecue or chili to balance all that richness. I love serving it slightly chilled but not ice cold, about 15 minutes out of the fridge. A cup of strong coffee or ice cold milk is practically mandatory.
Make Ahead Magic
The entire pie can be assembled up to 24 hours in advance, though I recommend adding that final crumble topping right before serving for maximum freshness. The whipped cream might weep slightly after a day, but it still tastes phenomenal. Actually, the flavors meld together even more beautifully overnight.
- Press plastic wrap directly onto the pudding surface before the final chill to prevent a skin from forming
- Save a little extra whipped cream on the side in case you need to touch up the piping before serving
- Leftovers keep well for 3 days in the refrigerator, though they rarely last that long in my house
 Save to Pinterest
 There is something so grounding about making a pie that has stood the test of time. Every slice feels like carrying on a delicious tradition.
Recipe FAQs
- → How long does Amish peanut butter pie need to chill?
-
The pie requires at least 2 hours of refrigeration time to fully set. This chilling period allows the custard-like filling to firm up properly, making clean slices easier. For the best results, you can make it the night before serving—it actually tastes better after sitting overnight as the flavors meld together.
- → Can I use chunky peanut butter instead of creamy?
-
Yes! While creamy peanut butter creates the smooth, velvety texture traditionally found in this Amish dessert, chunky peanut butter adds extra crunch and nutty flavor. If you prefer more texture throughout the filling, swap creamy for chunky. Just keep in mind the final consistency will be slightly less smooth.
- → What's the best way to store leftovers?
-
Store any leftover pie in the refrigerator, covered loosely with plastic wrap or aluminum foil. It will keep fresh for 3-4 days when properly chilled. The whipped cream topping may lose some of its stiffness over time, but the flavor remains delicious. For best results, bring slices to room temperature for about 10 minutes before serving.
- → Can I make this pie in advance?
-
Absolutely! This is an excellent make-ahead dessert. You can prepare the entire pie up to 24 hours before serving. In fact, making it a day ahead often improves the texture and allows the peanut butter flavor to deepen. Just keep it refrigerated until you're ready to serve, and add any final garnishes right before presenting.
- → What type of crust works best?
-
A traditional 9-inch baked pie crust works wonderfully, whether store-bought or homemade. For extra flavor, consider a graham cracker or shortbread crust which complement the creamy filling beautifully. Just ensure whatever crust you choose is fully baked and cooled before adding the warm peanut butter filling.
- → Why do I need to temper the egg yolks?
-
Tempering prevents the eggs from scrambling when they hit the hot milk mixture. By gradually whisking a small amount of the hot liquid into the yolks first, you gently raise their temperature. This crucial step ensures your filling remains silky smooth without any cooked egg bits, creating that luscious, glossy texture essential to this classic dessert.