 Save to Pinterest
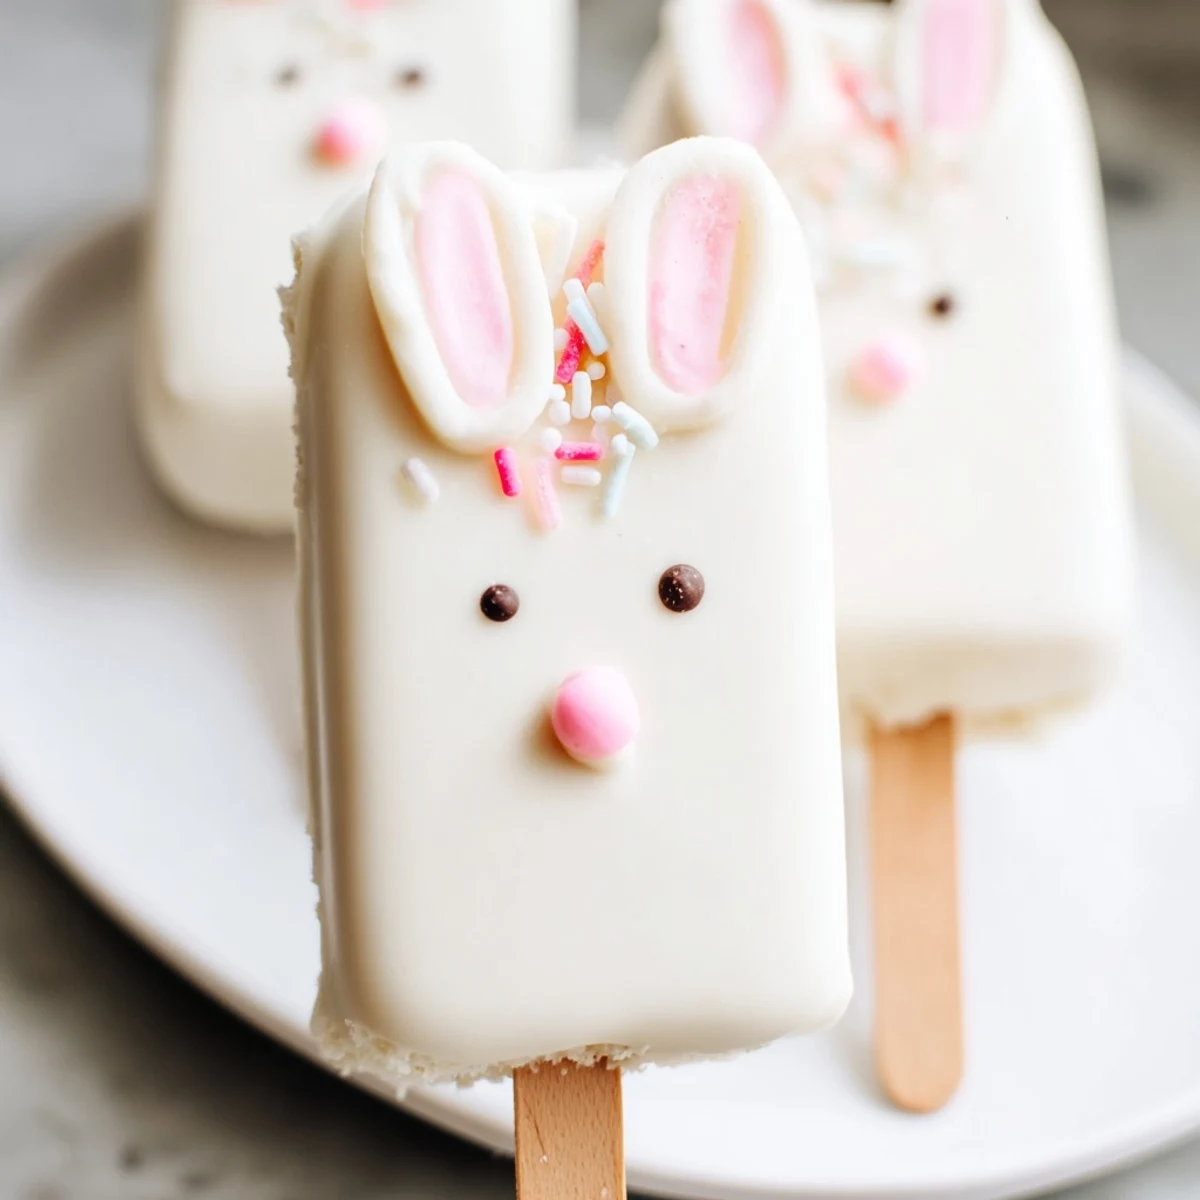
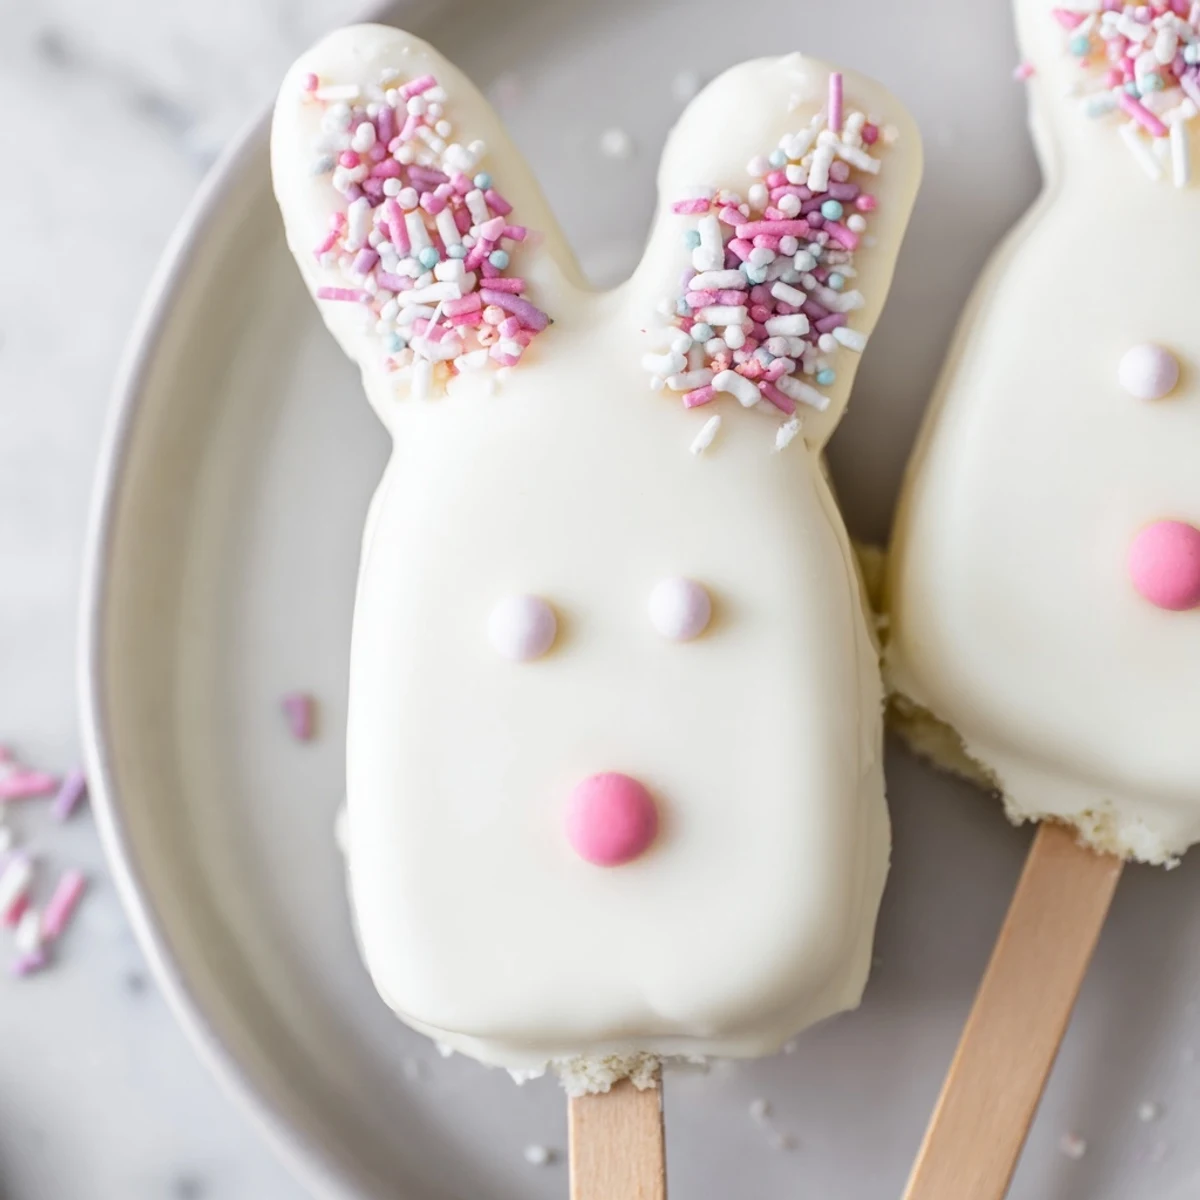
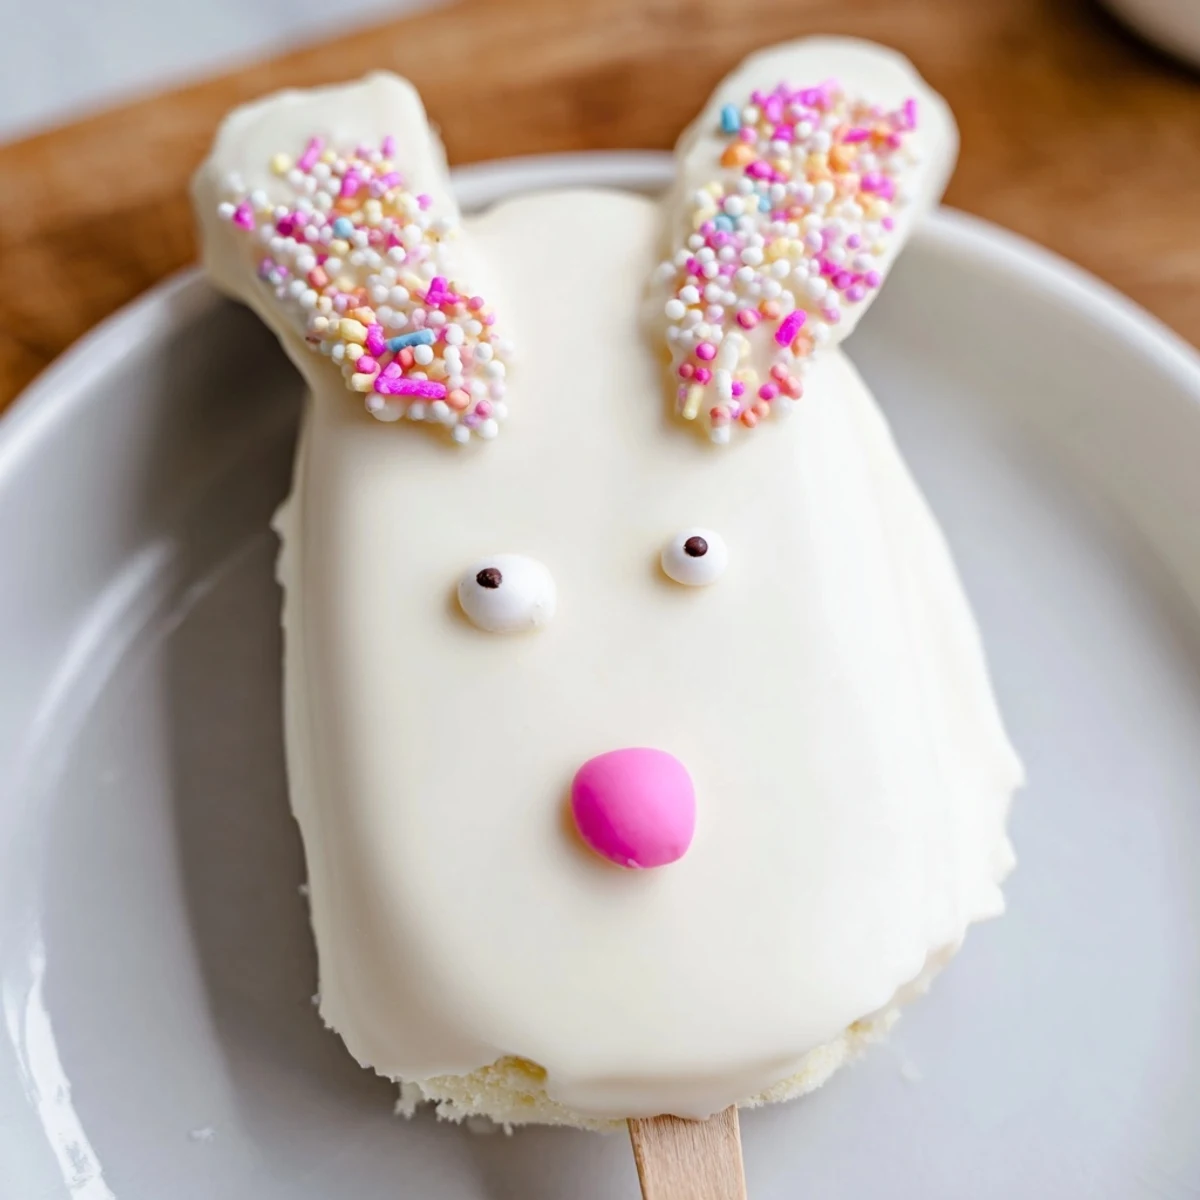
 These charming bunny-shaped cakesicles combine crumbled vanilla cake with cream cheese frosting, dipped in luscious white chocolate and decorated with colorful sprinkles and candy features. Perfect for Easter gatherings, they offer a delightful balance of sweetness and whimsy that both children and adults will adore.
My kitchen counter looked like a pastel explosion had gone off, and I could not have been happier about it. I had set out to make something festive for Easter brunch, not realizing I'd end up with white chocolate smeared across my cheek and pink food coloring somehow in my hair. These bunny cakesicles started as an experiment with leftover vanilla cake from the day before, but they quickly became the most requested treat in our house. Now they are the first thing my niece asks about as soon as March rolls around on the calendar.
Last Easter morning, I made the mistake of letting my cousin's three kids loose with the decorating supplies. I had visions of perfect bunny faces with precise pink noses and exactly positioned ears. What I got was a delightful chaos of sprinkle-covered faces, candy eyes placed sideways, and one bunny that looked suspiciously like a cat. They were the hit of the party, and honestly, those lopsided bunnies tasted even better than the picture-perfect ones.
Ingredients
- Vanilla cake crumbs: I use whatever cake I have on hand from birthdays or baking experiments, and the texture variation actually makes these more interesting
- Cream cheese: This is the binding agent that holds everything together, and room temperature is non-negotiable for smooth mixing
- Unsalted butter: Adds richness and helps the dough hold its shape without making it too soft
- Powdered sugar: Just enough sweetness to balance the cream cheese and help the mixture firm up nicely
- Vanilla extract: Pure vanilla makes a noticeable difference here since the cake flavor is the star
- White chocolate: I prefer white chocolate melts over chips because they melt more smoothly and coat more evenly
- Edible gel food coloring: Gel coloring works better than liquid for the details because it won't make the chocolate seize up
- Cakesicle sticks: Make sure to insert these before refrigerating so the cake has time to firm up around them
- Sprinkles and decorations: This is where you can go wild, and honestly, the messier the better with little helpers
Instructions
- Mix the cake dough:
- Combine the cake crumbs, cream cheese, butter, powdered sugar, and vanilla in a medium bowl. Mix with your hands or a spatula until everything comes together like cookie dough and holds its shape when squeezed.
- Shape the bunnies:
- Divide the mixture into 8 equal portions and gently flatten each into an oval shape. Press gently to form a slight point at the top for bunny ears, keeping them about a half inch thick.
- Add the sticks and chill:
- Insert a cakesicle stick about halfway into each shape, pressing the cake mixture firmly around it. Place them on a parchment-lined tray and refrigerate for at least 20 minutes until firm.
- Melt the white chocolate:
- Heat the white chocolate in a microwave-safe bowl in 30-second intervals, stirring between each. Stop when it is completely smooth and has the consistency of heavy cream.
- Dip and coat:
- Dip each chilled cake pop into the melted chocolate, turning it to coat completely. Gently tap against the bowl edge to remove excess, letting the extra drip off.
- Decorate quickly:
- Immediately add candy eyes, sprinkles, or fondant details while the chocolate is still wet. Work with one cakesicle at a time since the coating sets fast.
- Set and finish:
- Let the cakesicles stand at room temperature until completely firm, about 15 to 20 minutes. Use food coloring pens for final details like whiskers or noses if desired.
 Save to Pinterest
 My friend Sarah brought these to our Easter potluck last year, and I swear I saw grown adults practically fighting over the last one. She had made tiny fondant bows for the girl bunnies and little blue bow ties for the boys, and the attention to detail was absurd. That afternoon cemented these treats as a non-negotiable tradition for every spring gathering we host.
Making Them Ahead
I learned the hard way that these are best made the day before your event. The cake centers need time to firm up in the refrigerator, and the chocolate coating actually improves after a few hours. Wrap them individually in plastic wrap after they have completely set, and store them in the refrigerator until you are ready to serve.
Cake Flavor Variations
Vanilla is classic, but chocolate cake crumbs with white chocolate coating creates a gorgeous cookies and cream vibe. Lemon cake works beautifully for spring, and red velvet makes these feel especially fancy. Whatever cake you choose, make sure it is completely cooled before making the crumbs, or the texture will turn gummy.
Decorating Like A Pro
The secret to professional-looking details is having everything ready before you start dipping. Line up your sprinkles, candy eyes, and any fondant pieces in small bowls so you can work quickly once the cakesicle is coated. If you want marbled ears, swirl a tiny bit of pink food coloring into a small bowl of white chocolate before dipping just the ear portions.
- Set up a decorating station with parchment paper before you start melting the chocolate
- Keep a toothpick handy for repositioning wayward sprinkles or candy pieces
- Work with one cakesicle at a time once you start dipping
 Save to Pinterest
 There is something about seeing these lined up on a platter that makes any celebration feel instantly more festive. Hope they bring as much joy to your table as they have to mine.
Recipe FAQs
- → Can I make these cakesicles ahead of time?
-
Yes, you can prepare these up to 3 days in advance. Store them in an airtight container in the refrigerator to maintain freshness and keep the chocolate coating intact.
- → What other cake flavors work well?
-
Chocolate, lemon, red velvet, or strawberry cake create delicious variations. The neutral white chocolate coating complements most flavors beautifully.
- → Do I need a special mold?
-
While a cakesicle mold helps create uniform shapes, you can hand-form the bunny faces. Simply shape the cake mixture into ovals and insert sticks before chilling.
- → How do I prevent the chocolate from cracking?
-
Ensure the cake pops are thoroughly chilled before dipping. Use room-temperature chocolate and avoid over-tapping when removing excess coating.
- → Can I use candy melts instead of real chocolate?
-
Absolutely! White candy melts work wonderfully and often set up faster than traditional chocolate. They're also easier to color for decorative details.